通常,构建脚本 (build.gradle(.kts)) 详细说明了构建配置、任务和插件。
每个 Gradle 构建至少包含一个构建脚本。
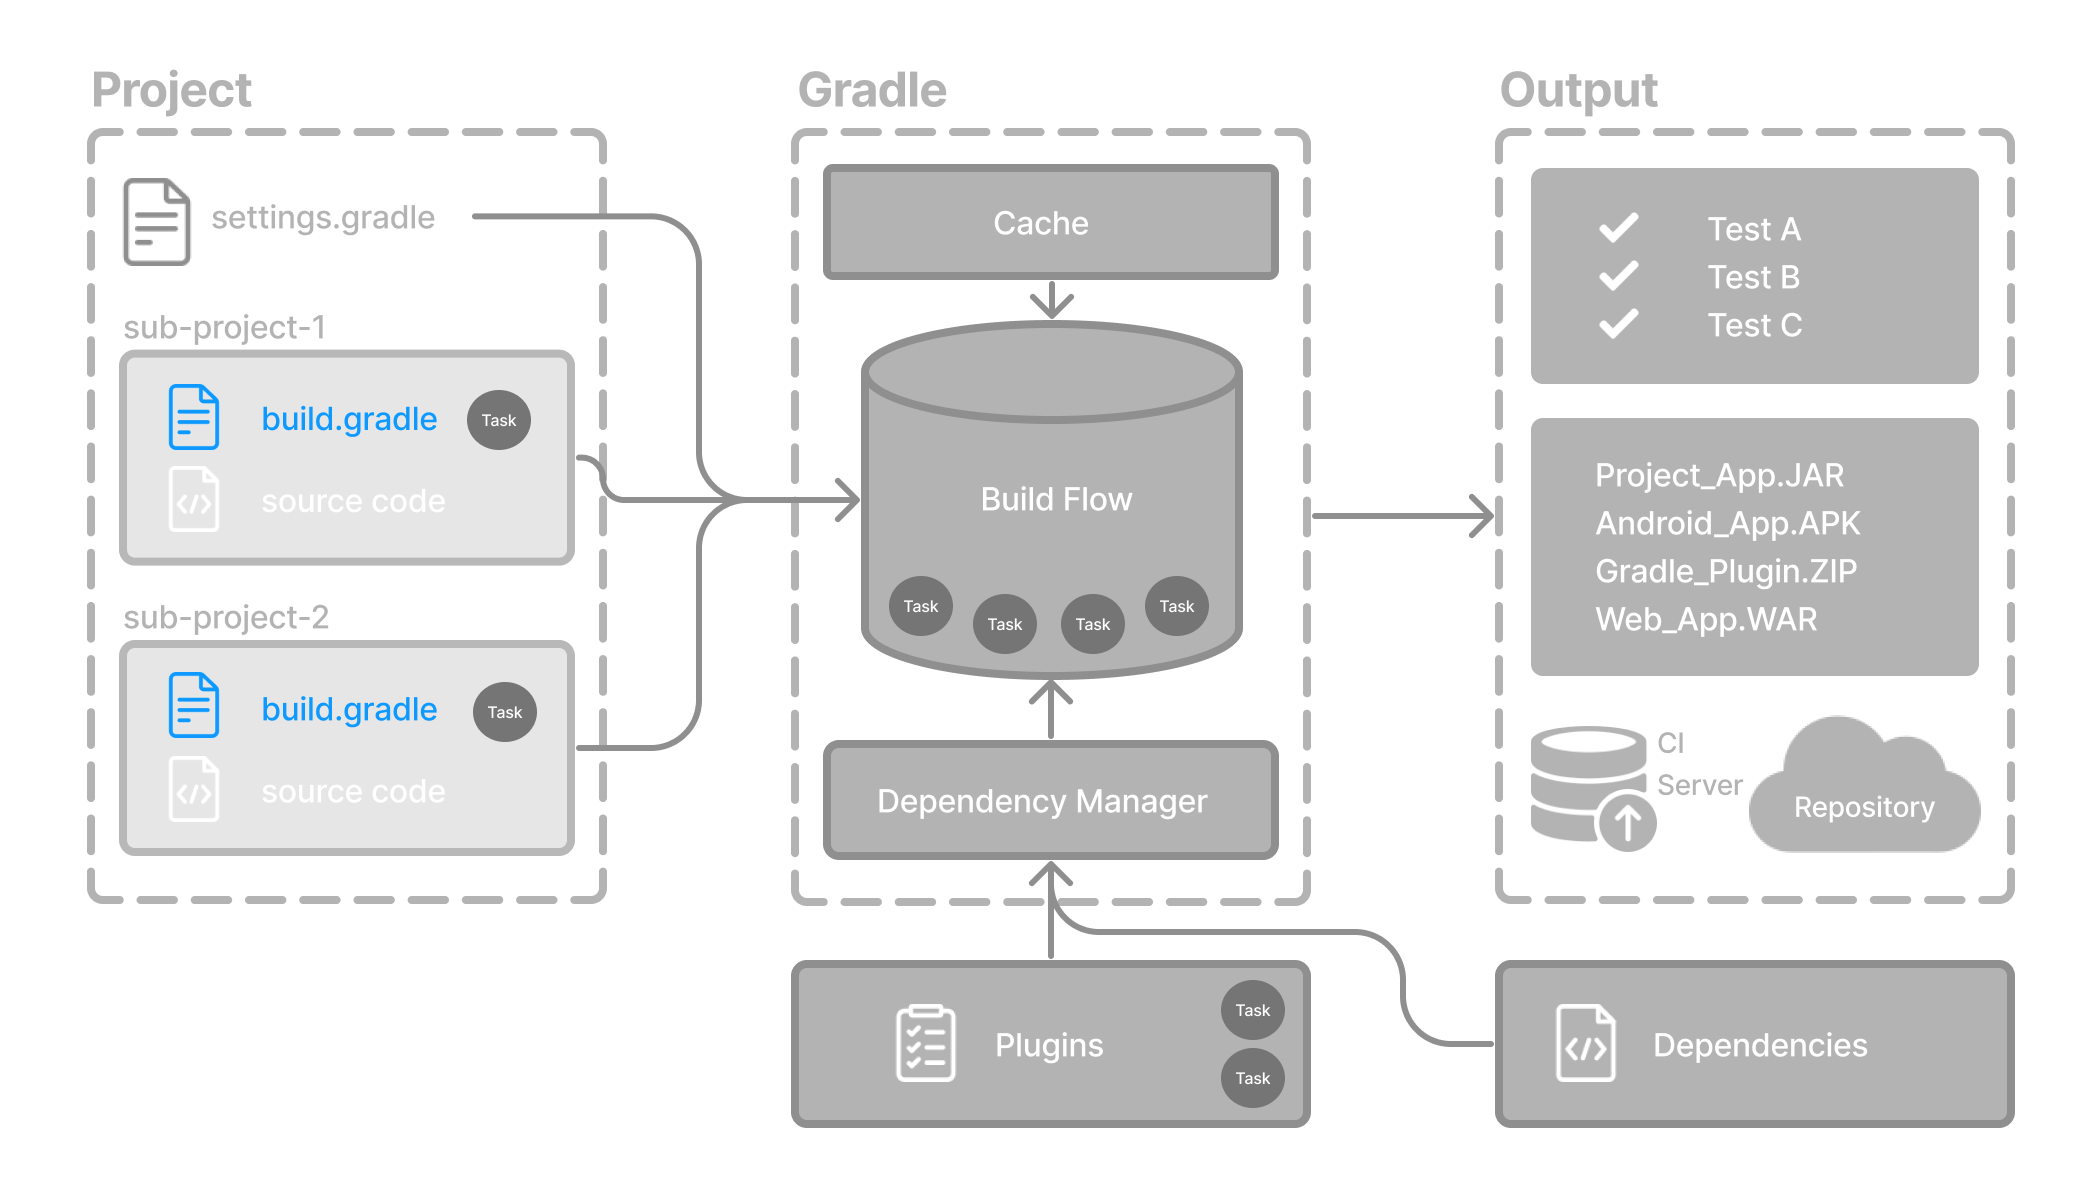
构建脚本
构建脚本可以是使用 Groovy 编写的 build.gradle 文件,也可以是使用 Kotlin 编写的 build.gradle.kts 文件。
Groovy DSL 和 Kotlin DSL 是 Gradle 脚本唯一接受的语言。
在多项目构建中,每个子项目通常都有自己的构建文件,位于其根目录中。
在构建脚本中,您通常会指定
-
插件:扩展 Gradle 功能的工具,用于编译代码、运行测试或打包 artifact 等任务。
-
依赖:您的项目使用的外部库和工具。
具体来说,构建脚本包含两种主要类型的依赖
-
Gradle 和构建脚本依赖:这包括 Gradle 本身或构建脚本逻辑所需的插件和库。
-
项目依赖:您的项目源代码正确编译和运行所需的库。
让我们看一个例子并将其分解
plugins {   (1)
    // Apply the application plugin to add support for building a CLI application in Java.
    application
}
dependencies {  (2)
    // Use JUnit Jupiter for testing.
    testImplementation(libs.junit.jupiter)

    testRuntimeOnly("org.junit.platform:junit-platform-launcher")

    // This dependency is used by the application.
    implementation(libs.guava)
}
application {   (3)
    // Define the main class for the application.
    mainClass = "org.example.App"
}plugins { (1)
// Apply the application plugin to add support for building a CLI application in Java.
id 'application'
}
dependencies { (2)
// Use JUnit Jupiter for testing.
testImplementation libs.junit.jupiter
testRuntimeOnly 'org.junit.platform:junit-platform-launcher'
// This dependency is used by the application.
implementation libs.guava
}
application { (3)
// Define the main class for the application.
mainClass = 'org.example.App'
}| 1 | 添加插件。 |
| 2 | 添加依赖。 |
| 3 | 使用约定属性。 |
1. 添加插件
插件扩展了 Gradle 的功能,并可以为项目贡献任务。
向构建添加插件称为应用插件,这会使额外的功能可用。
plugins {   (1)
    // Apply the application plugin to add support for building a CLI application in Java.
    application
}plugins { (1)
// Apply the application plugin to add support for building a CLI application in Java.
id 'application'
}application 插件有助于创建可执行的 JVM 应用程序。
应用 Application 插件还会隐式应用 Java 插件。java 插件为项目添加了 Java 编译以及测试和捆绑功能。
2. 添加依赖
您的项目需要外部库才能编译、运行和测试。
在此示例中,项目使用 JUnit Jupiter 进行测试,并在主应用程序代码中使用 Google 的 Guava 库
dependencies {  (2)
    // Use JUnit Jupiter for testing.
    testImplementation(libs.junit.jupiter)

    testRuntimeOnly("org.junit.platform:junit-platform-launcher")

    // This dependency is used by the application.
    implementation(libs.guava)
}dependencies { (2)
// Use JUnit Jupiter for testing.
testImplementation libs.junit.jupiter
testRuntimeOnly 'org.junit.platform:junit-platform-launcher'
// This dependency is used by the application.
implementation libs.guava
}3. 使用约定属性
插件为项目添加任务。它还为项目添加属性和方法。
application 插件定义了打包和分发应用程序的任务,例如 run 任务。
Application 插件提供了一种声明 Java 应用程序主类的方法,这是执行代码所必需的。
application {   (3)
    // Define the main class for the application.
    mainClass = "org.example.App"
}application { (3)
// Define the main class for the application.
mainClass = 'org.example.App'
}在此示例中,主类(即程序执行开始的点)是 org.example.App。
构建脚本在构建的配置阶段进行评估,它们充当定义(子)项目构建逻辑的主要入口点。除了应用插件和设置约定属性外,构建脚本还可以
-
声明依赖
-
配置任务
-
引用共享设置(来自版本目录或约定插件)
要了解有关脚本构建文件的更多信息,请参阅 编写构建文件。
下一步: 了解依赖管理 >>